[AWS] 코그니토: 회원가입
이전 포스트
https://blog.naver.com/sssang97/222095139270
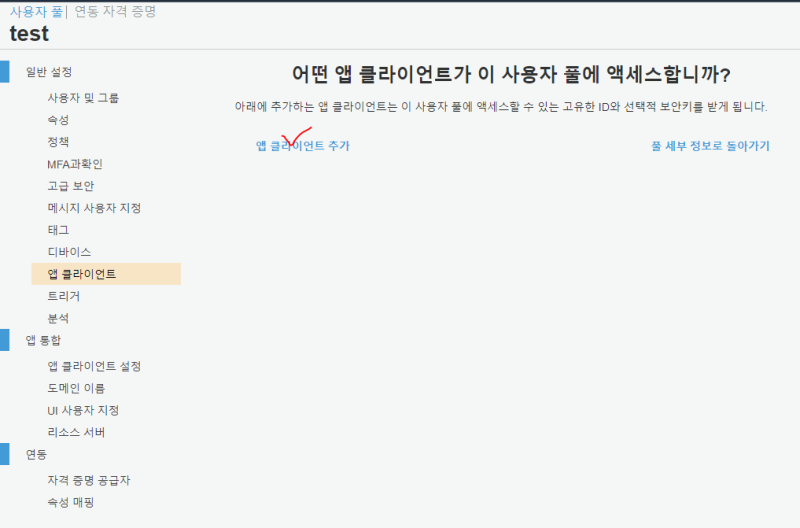
사용자 풀에 들어가서 앱 클라이언트를 추가한다.
앱 클라이언트가 있어야 앱에서 사용할 수가 있다.
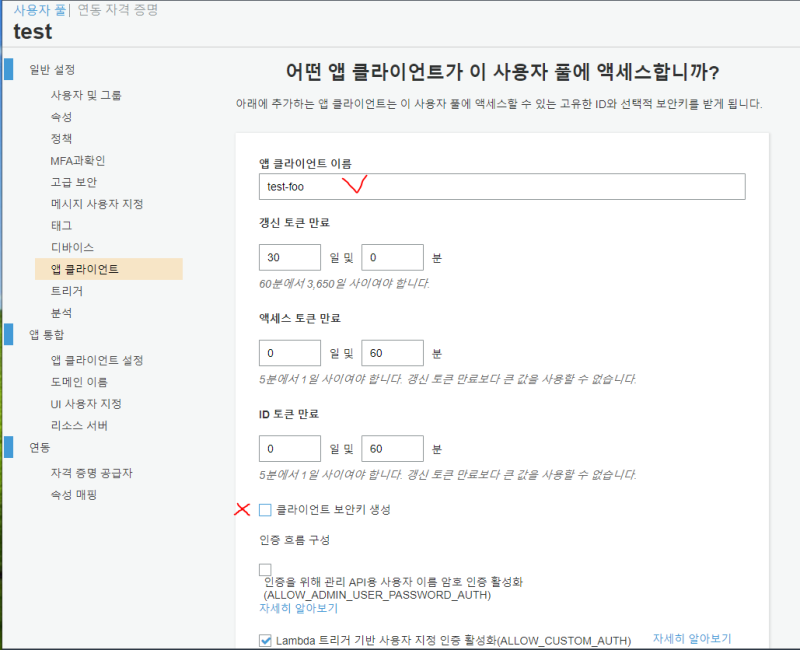
이름을 잘 지어주고, 클라이언트 보안키를 해제한다.
공식 문서에 따르면 필수적인 부분은 아닌 것 같다.
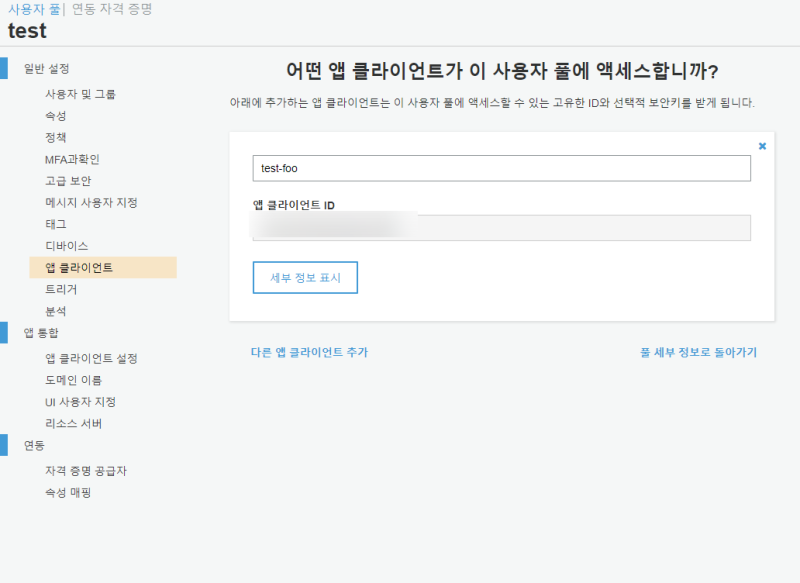
생성하면 이렇게 클라이언트 ID가 뜬다.
앞으로 연동할때 이걸 붙이게 될 것이다.
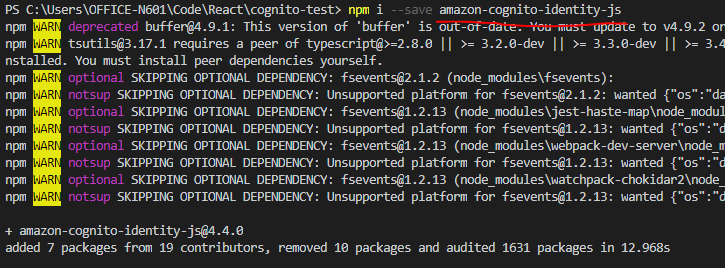
그리고 프로젝트를 파서 코그니토와 연결해보겠다.


그리고 cognito 연동을 위한 전용 모듈을 설치한다.
회원 가입
가입 신청은 대충 이런식으로 할 수 있다.
const {
    CognitoUserAttribute,
    CognitoUserPool,
} = require("amazon-cognito-identity-js");

const userPool = new CognitoUserPool({
    UserPoolId: "유저풀 ID 복붙",
    ClientId: "클라이언트 ID 복붙",
});

userPool.signUp(
    "sssang97", //username
    "foobar123", //password
    [
        new CognitoUserAttribute({
            Name: "email",
            Value: "sssang97@naver.com",
        }),
        new CognitoUserAttribute({ Name: "nickname", Value: "myyrakle" }),
    ],
    null,
    function (error, result) {
        if (error) {
            console.log(error);
        } else {
            console.log(result);
        }
    }
);
저기서 핵심은 당연히 signUp함수인데, 가입할 사용자명, 패스워드를 인자로 넣고
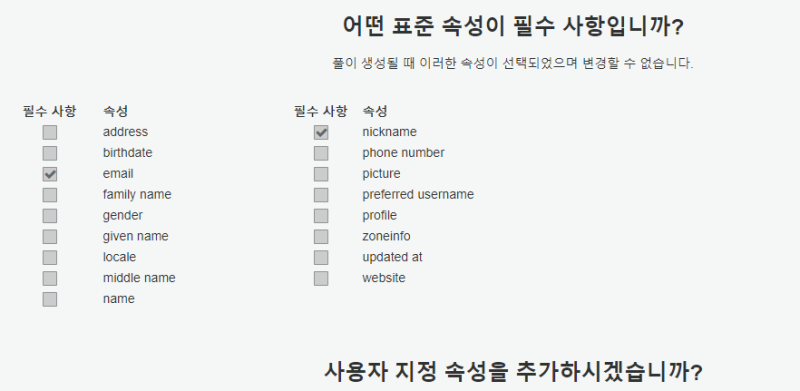 저기서 지정된 표준 속성이나 사용자 지정속성을 CognitoUserAttribute 배열로 만들어서 또 넣어준다. Name이 속성이름이고 Value가 넣을 값이다.
그리고 null 하나 찍고, 5번째 인자에 핸들러를 넣어주면 된다.
저렇게 해놓고 실행해보자
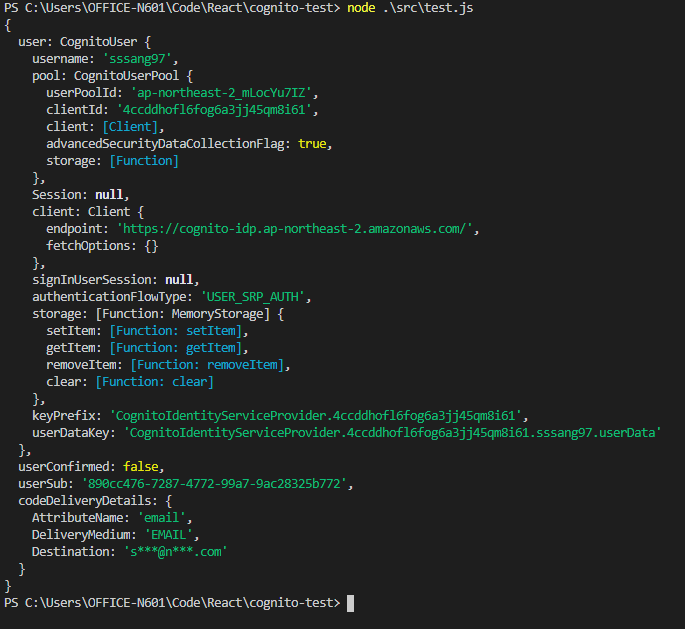 만약 사용자풀이 인증문자나 인증메일을 받아서 인증을 받도록 설정되어있다면 바로 완전하게 가입이 되진 않고, 미인증상태로 등록이 될 것이다.
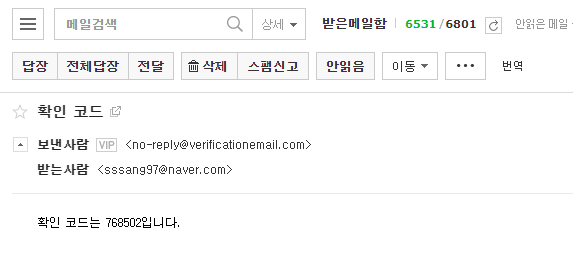
그럼 확인 코드도 날라오고
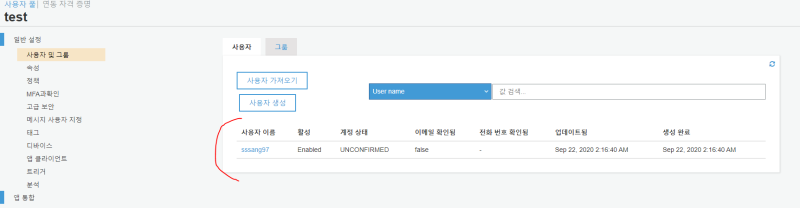
사용자풀에도 미인증상태로나마 등록이 될 것이다.
인증을 하려면 대충 이렇게 짜서 쏘면 된다.
const user = new CognitoUser({ Username: "sssang97", Pool: userPool });

user.confirmRegistration("768502", true, (error, result) => {
    if (error) {
        console.log(error);
    } else {
        console.log(result);
    }
});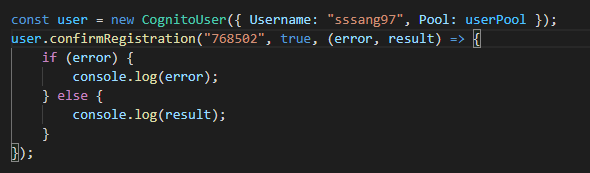

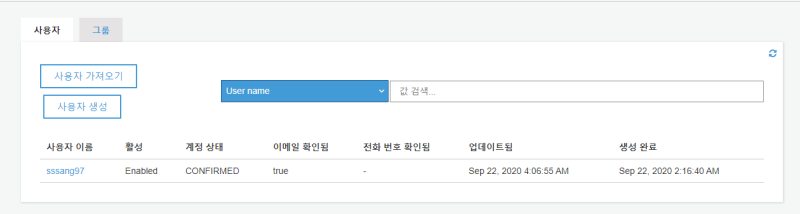
잘 된다면, 사용자 풀에서도 인증이 완료될 것이다.
로그인
로그인은 또 이렇게 하면 된다.
아이디와 패스워드를 적어서 저런식으로 넣으면, 로그인 정보 객체가 날라오면서 CognitoUser 객체가 인증 상태가 된다.
const user = new CognitoUser({ Username: "sssang97", Pool: userPool });
user.authenticateUser(
new AuthenticationDetails({ Username: "아이디", Password: "비밀번호" }),
{
onSuccess: (result) => {
console.log("로그인됨");
console.log(result);
const token = result.getAccessToken().getJwtToken();
console.log("token:", token);
user.getUserAttributes((error, result) => {
if (error) {
console.log(error);
} else {
console.log("속성:", result);
}
});
},
onFailure: (error) => {
console.log(error);
},
}
);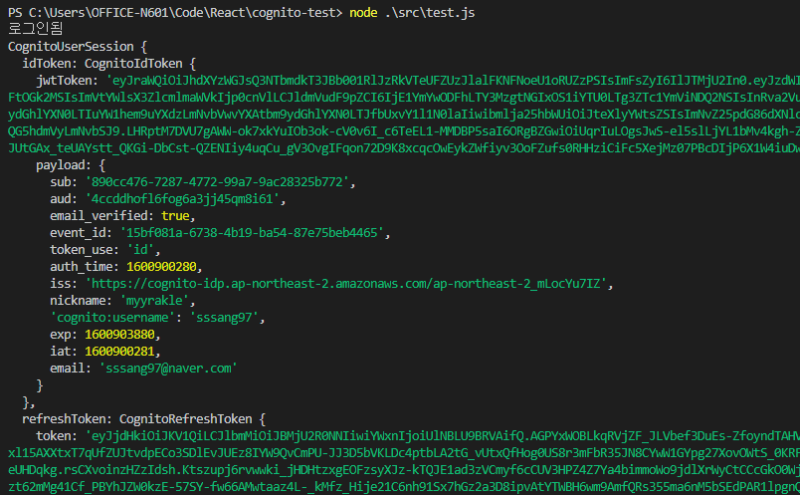 인증 상태에서는 사용자 정보를 수정하거나, 패스워드를 변경하는 등의 사용자 관련 제어작업을 수행할 수 있다.
그리고 인증 토큰도 던져주는데, 인증이 필요한 요청에 써먹을 수 있다.
여기선 구조를 대충 훑어보기 위해서 amazon-cognito-identity만 썼는데, 보통은 좀더 편리하고 통합되어 구성된 Amplify라는 것을 사용한다.
다음에는 그걸 통해 인증을 제대로 응용해보겠다.
참조
https://walkinpcm.blogspot.com/2017/05/aws-aws-cognito.html
https://docs.aws.amazon.com/ko_kr/cognito/latest/developerguide/user-pool-settings-client-apps.html
https://www.npmjs.com/package/amazon-cognito-identity-js
https://zellwk.com/blog/converting-callbacks-to-promises/
http://blog.naver.com/PostView.nhn?blogId=chandong83&logNo=221896361250&categoryNo=111&parentCategoryNo=0&viewDate=¤tPage=1&postListTopCurrentPage=1&from=postView