[k8s] kube-rs로 operator 만들어보기
관련 포스트
https://blog.naver.com/sssang97/223460590757
여기서는 kube-rs를 활용해서 간단한 operator를 만들고 클러스터에 띄워보는 것까지를 한번 해보겠다.
CustomResource와 상호작용하는 것까지는 아직 다루지 않는다.
종속성
먼저 아래 종속성들을 추가해준다.
[dependencies]
tokio = { version = "1", features = ["full"] }
kube = { version = "0.91.0", features = ["runtime", "derive", "runtime"] }
k8s-openapi = { version = "0.22.0", features = ["latest"] }
serde_json = "1.0.117"
serde = "1.0.203"
kube-derive = "0.91.0"
schemars = "0.8.21"
futures = "0.3.30"
anyhow = "1.0.86"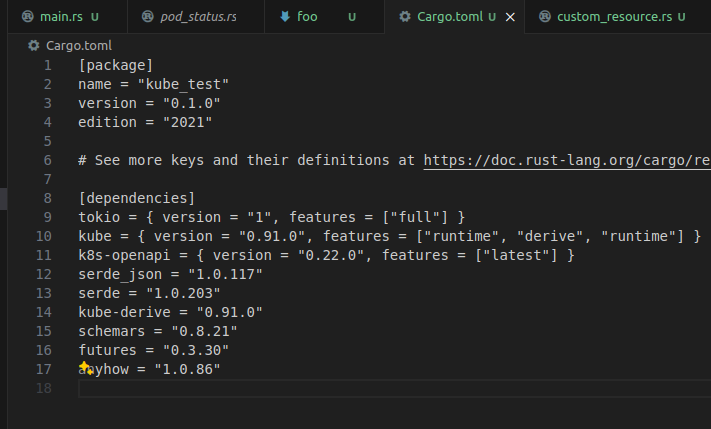 필요한게 조금 많다.
tokio는 비동기 처리를 위한 런타임. serde/serde_json은 json 처리를 위한 모듈.
anyhow는 편리한 오류처리를 위한 모듈이다.
Hello Pods
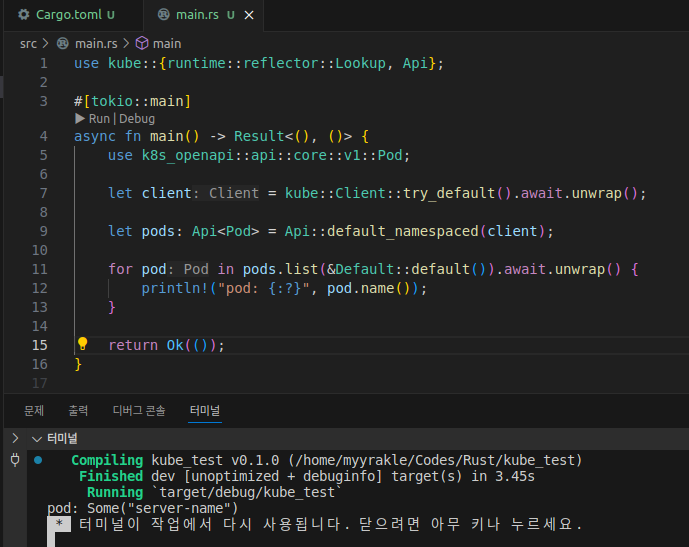
아래 코드는 현재 클러스터 정보에 접속해서 Pod 리스트를 조회하는 간단한 코드다.
use kube::{runtime::reflector::Lookup, Api};

#[tokio::main]
async fn main() -> Result<(), ()> {
    use k8s_openapi::api::core::v1::Pod;

    let client = kube::Client::try_default().await.unwrap();

    let pods: Api<Pod> = Api::default_namespaced(client);

    for pod in pods.list(&Default::default()).await.unwrap() {
        println!("pod: {:?}", pod.name());
    }

    return Ok(());
}
먼저 try_default를 통해서 클라이언트를 가져온다. 이러면 실제 pod 환경에서는 스스로의 접속정보를 가져온다.
k8s 클러스터가 설치된 로컬 환경에서도 문제 없이 접속된다.
그리고 default_namespaced를 통해서 Pod 정보를 조회해온다.
저 디폴트 네임스페이스는 컨텍스트에 따라서 다르게 동작한다. 클러스터의 로컬 환경에서는 default 네임스페이스를 참조하지만, Pod 내에서 동작할 경우에는 그 Pod가 포함된 네임스페이스를 참조하게 된다.
 현재 실제 default 네임스페이스에는 pod 하나가 있고
 프로그램을 실행해도 동일한 pod 정보를 가져올 것이다.
바로 이게 operator의 기본이다. 본질적으로는 그냥 k8s api를 쏴서 값을 가져오거나, 수정하는 것이다.
이벤트 리스닝
위의 예제에서는 그냥 pod 정보를 한번 읽고 슥 죽어버렸다.
실제 환경에서 operator를 저렇게 만드는 경우는 거의 없을 것이고, 보통은 항상 무한루프로 떠있으면서 이벤트를 전송받고 그에 따른 액션을 행하는 것이 주된 동작이 된다.
아래는 현재 네임스페이스의 Pod 이벤트를 수신하는 간단한 예제 코드다.
use std::pin::pin;

use futures::TryStreamExt;
use k8s_openapi::api::core::v1::Pod;
use kube::{
    runtime::{
        watcher::{watcher, Config},
        WatchStreamExt,
    },
    Api, ResourceExt,
};

#[tokio::main]
async fn main() -> anyhow::Result<()> {
    let client = kube::Client::try_default().await?;

    let pods: Api<Pod> = Api::default_namespaced(client);

    let stream = watcher(pods, Config::default()).applied_objects();
    let mut pinned_stream = pin!(stream);

    while let Some(event) = pinned_stream.try_next().await? {
        let pod_name = event.name_any();

        let status = event.status.map(|e| e.phase).flatten();

        println!("Pod: {} is in phase: {:?}", pod_name, status);
    }

    return Ok(());
}
stream을 생성해서 Pod 이벤트가 수신될 때마다 로그를 찍어주는 간단한 역할만을 한다.
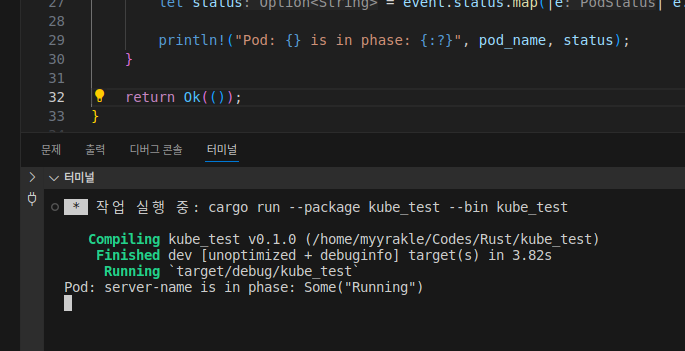 실행해보면, 현재 존재하는 Pod에 대한 정보를 전부 다 스캔해서 보여주고 시작한다.
그리고 pod를 추가로 띄운다면

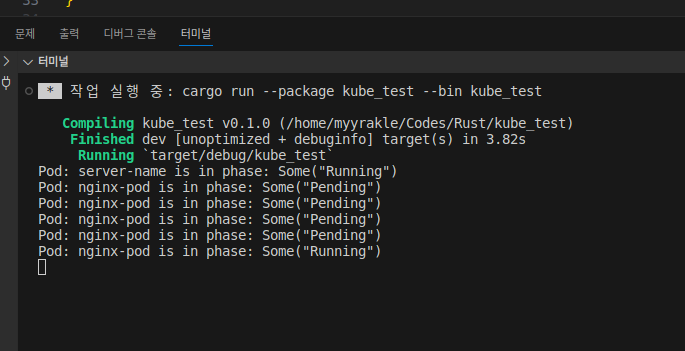 그에 대한 상태 변경 이벤트를 받고
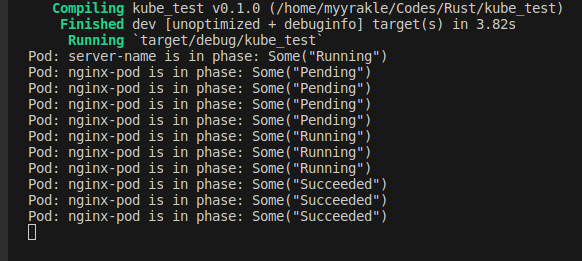 내리면 또 내리는대로 반응해서 로그를 남겨준다.
Health Check Server 구현
근데 operator는 특성상 가용성과 회복성이 중요하다. 자동화된 회복을 원한다면 health check 같은걸 구성해야 하는데, 그러려면 health check용 서버를 또 띄우는 것이 좀 권장된다.
먼저 필요한 종속성을 추가해주고
hyper = { version = "1", features = ["full"] }
http-body-util = "0.1"
hyper-util = { version = "0.1", features = ["full"] }
간단한 서버 로직을 구현했다.
use std::convert::Infallible;
use std::net::SocketAddr;

use http_body_util::Full;
use hyper::body::Bytes;
use hyper::server::conn::http1;
use hyper::service::service_fn;
use hyper::{Request, Response};
use hyper_util::rt::TokioIo;
use tokio::net::TcpListener;

async fn hello(_: Request<hyper::body::Incoming>) -> Result<Response<Full<Bytes>>, Infallible> {
    Ok(Response::new(Full::new(Bytes::from("OK"))))
}

pub fn run_server() {
    tokio::spawn(async move {
        let addr = SocketAddr::from(([0, 0, 0, 0], 8081));

        // We create a TcpListener and bind it to 127.0.0.1:3000
        let listener = TcpListener::bind(addr).await.unwrap();

        // We start a loop to continuously accept incoming connections
        loop {
            let (stream, _) = listener.accept().await.unwrap();

            // Use an adapter to access something implementing `tokio::io` traits as if they implement
            // `hyper::rt` IO traits.
            let io = TokioIo::new(stream);

            // Spawn a tokio task to serve multiple connections concurrently
            tokio::task::spawn(async move {
                // Finally, we bind the incoming connection to our `hello` service
                if let Err(err) = http1::Builder::new()
                    // `service_fn` converts our function in a `Service`
                    .serve_connection(io, service_fn(hello))
                    .await
                {
                    println!("Error serving connection: {:?}", err);
                }
            });
        }
    });
}
8081 포트로 열어서 항상 200을 던지도록 했다.
 그리고 그걸 메인 로직에서 non-blocking으로 실행되게끔 추가했다.
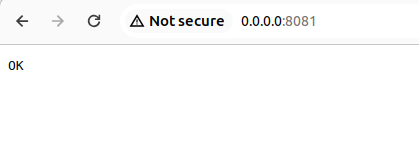 잘 돈다.
잘 돈다.
이제 준비가 얼추 되었다.
클러스터에 operator 배포하기
이제 위의 간단한 pod watcher를 내 클러스터에 완전한 operator로서 배포해보자.
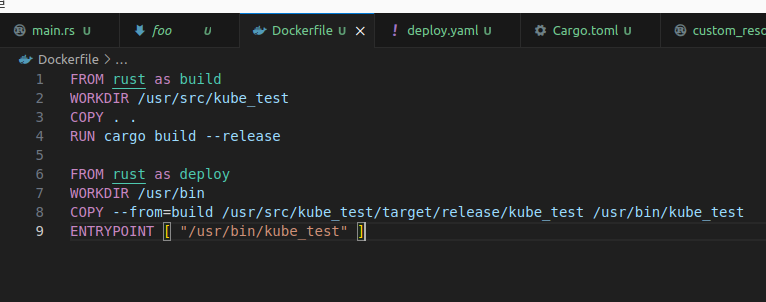
먼저 docker 이미지를 말아줘야 한다.
결국에는 operator controller도 k8s 클러스터에 pod를 띄워서 돌리는 것이기 때문이다.
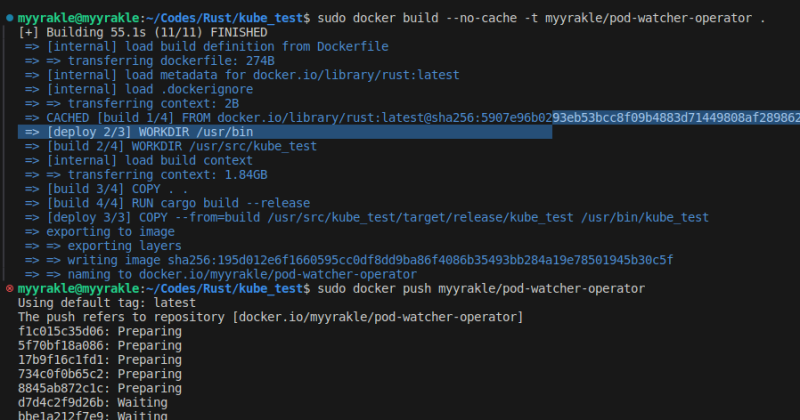 말아서 레지스트리에까지 직접 올리고
그다음에는 yaml 배포 구성을 작성해야 한다.
apiVersion: v1
kind: Namespace
metadata:
  labels:
    control-plane: controller-manager
  name: operators
---
apiVersion: v1
kind: ServiceAccount
metadata:
  name: controller-manager
  namespace: operators
---
kind: ClusterRole
apiVersion: rbac.authorization.k8s.io/v1
metadata:
  name: manager-role
rules:
- apiGroups:
  - ""
  resources:
  - pods
  - services
  - endpoints
  - events
  - configmaps
  - secrets
  - namespaces
  - serviceaccounts
  verbs:
  - '*'
---
apiVersion: rbac.authorization.k8s.io/v1
kind: ClusterRoleBinding
metadata:
  name: manager-rolebinding
roleRef:
  apiGroup: rbac.authorization.k8s.io
  kind: ClusterRole
  name: manager-role
subjects:
- kind: ServiceAccount
  name: controller-manager
  namespace: operators
---
apiVersion: apps/v1
kind: Deployment
metadata:
  name: controller-manager
  namespace: operators
  labels:
    control-plane: controller-manager
spec:
  selector:
    matchLabels:
      control-plane: controller-manager
  replicas: 1
  template:
    metadata:
      labels:
        control-plane: controller-manager
    spec:
      securityContext:
      containers:
      - command:
        - /usr/bin/kube_test
        image: myyrakle/pod-watcher-operator:v0.2.0
        name: manager
        securityContext:
          allowPrivilegeEscalation: false
        livenessProbe:
          httpGet:
            path: /healthz
            port: 8081
          initialDelaySeconds: 15
          periodSeconds: 20
        readinessProbe:
          httpGet:
            path: /readyz
            port: 8081
          initialDelaySeconds: 5
          periodSeconds: 10
        resources:
          limits:
            cpu: 100m
            memory: 30Mi
          requests:
            cpu: 100m
            memory: 20Mi
      serviceAccountName: controller-manager
      terminationGracePeriodSeconds: 10
---
권한 설정이 필요한게 많아서 좀 길어졌다.
ClusterRole로 k8s api에 날릴 수 있는 권한을 정의해주고, 그걸 ClusterRoleBinding를 통해 실제 pod 정보와 매핑한다.
그리고 실제 operator controller는 deployment 단위를 통해 구성했다. 꼭 저걸 써야하는건 아니지만, 보통 deployment를 쓴다.
저걸 클러스터에 올리기만 하면 된다.
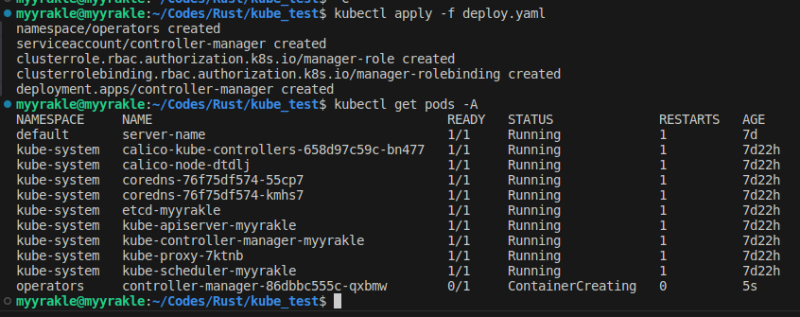
 그럼 controller pod가 뜰 것이고
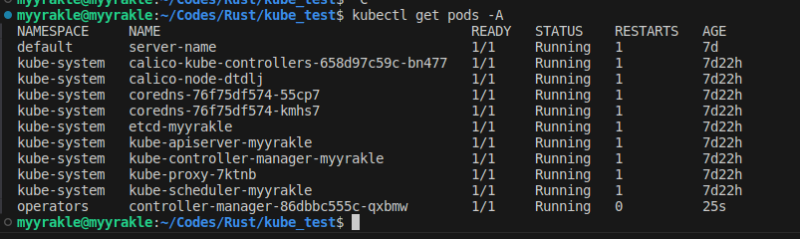
 기대한대로 동작할 것이다.

 pod를 띄우면 띄운대로 잘 모니터링하는 것을 볼 수 있다.
아래는 전체 예제 코드다.
https://github.com/myyrakle/infrastructures/tree/master/k8s/examples/operators/pod-watcher
CustomResource를 이용해서 본격적으로 시스템을 확장하는건 다음 포스트에서 다뤄보도록 하겠다.
참조
https://blog.appliedcomputing.io/p/writing-a-kubernetes-scheduler-in
https://kube.rs/getting-started/
https://frozenpond.tistory.com/146