[LLM] MCP 서버 구성해보기
이전 포스트
https://blog.naver.com/sssang97/223827361065
이번 포스트에서는 직접 MCP 서버를 구성해보고, 기존 클라이언트를 활용하기는 것까지도 대강 다뤄보겠다.
여기서는 MCP의 주요한 리소스 단위인 "Tool"만 다룬다.
그리고 실사용에서 클라이언트를 직접 만들 일은 잘 없을 것이다. 웬만하면 기존 IDE나 기타 도구에서 지원하는 GUI 기반으로 사용하게 될 것이기 때문이다.
MCP는 HTTP와 비슷한 프로토콜일 뿐이라서, 인터페이스만 맞춘다면 어떤 언어로든 개발할 수 있다.
여기서는 Python으로 실습해보겠으나, 다른 언어들로도 가능하다.
https://modelcontextprotocol.io/quickstart/server
MCP 서버 구성해보기
패키지매니저는 uv를 사용한다. 이거 좀 써보니까 다른건 못 쓸 것 같다.
모듈 좀 설치해주고
uv add "mcp[cli]" httpx
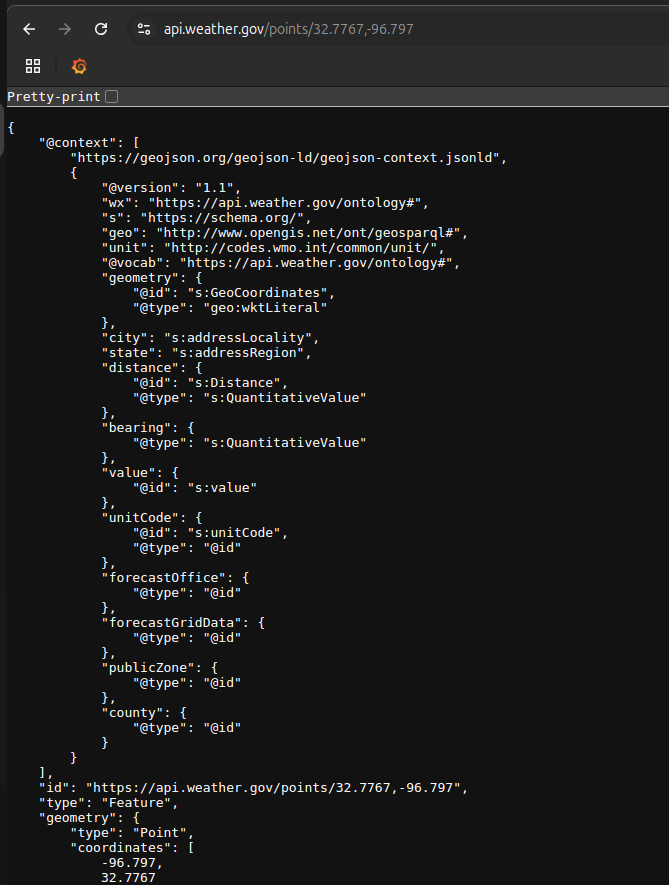
우리가 지금 MCP의 데이터소스로 연동할 것은 미국 정부에서 제공하는 날씨 정보 API다.
 사실 소스는 뭘 써도 상관 없긴 한데, 그냥 만만한 녀석인 것 같아서 이걸로 했다.
이걸 쓰면 좌표 기반으로 날씨 정보를 가져올 수 있고
특정 주에서의 날씨 경보를 가져올 수도 있다.
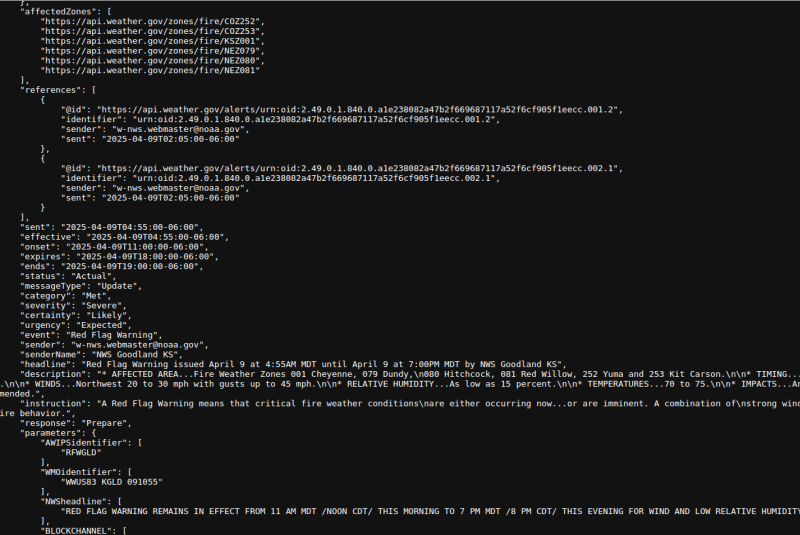 KS는 켄자스다.
자, 그럼 하나씩 쳐보자.
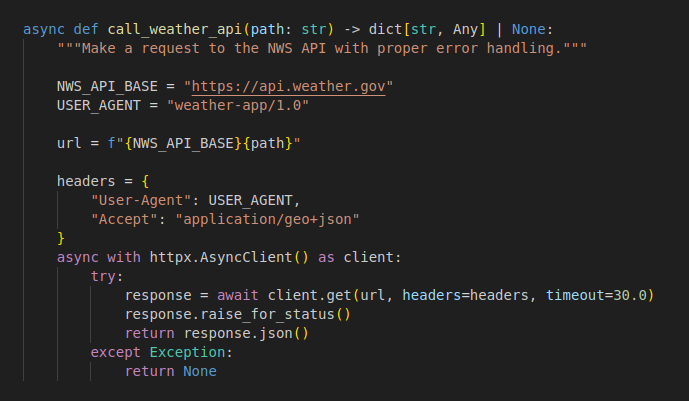 일단 API 호출 템플릿이다. 그냥 API 호출 자체만 함수화한거다. 별거 없다.
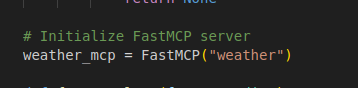 그리고 mcp 서버를 초기화한다.
이게 서버 객체다. 이걸 기반으로 각각의 API를 라우팅하고, 실행까지 책임진다.
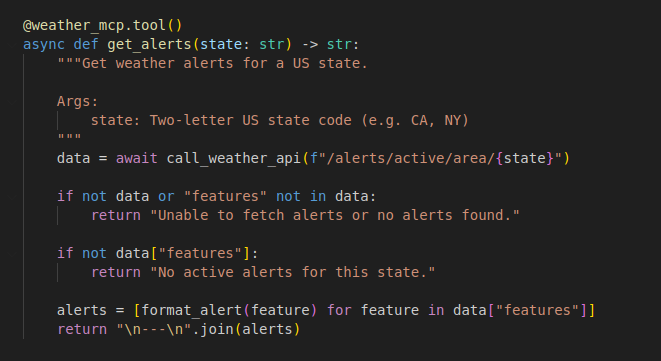 이 "tool"이라고 하는 것이 MCP 서버의 기본적인 기능 단위다.
이거 하나하나가 웹서버의 API와 동등하다고 볼 수 있다.
이 경우에는 주(state) 정보를 받고 응답을 좀 꾸며주기만 한 뒤에
 그대로 반환해주도록 했다.
그리고 좌표 기반의 날씨 조회도 하나 만들었다.
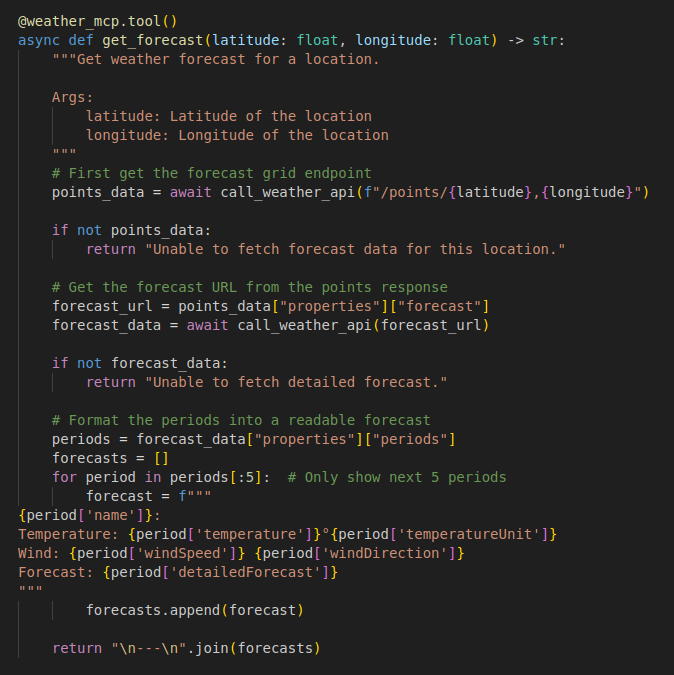 여기서 중요한 것은 사실 함수 상단에 있는 주석이다.
최상단에 주석을 잔뜩 넣어놓으면, mcp 라이브러리는 각각의 도구에 대한 설명으로 인식하고 실제로 데이터 수준으로 넣어버린다. 그리고 그걸 LLM이 도구를 사용할 때 참조하기 때문에 매우 중요한 부분이다.
아래는 전체 코드다.
from typing import Any
from mcp.server.fastmcp import FastMCP
import httpx

async def call_weather_api(path: str) -> dict[str, Any] | None:
    """Make a request to the NWS API with proper error handling."""

    NWS_API_BASE = "https://api.weather.gov"
    USER_AGENT = "weather-app/1.0"

    url = f"{NWS_API_BASE}{path}"

    headers = {
        "User-Agent": USER_AGENT,
        "Accept": "application/geo+json"
    }
    async with httpx.AsyncClient() as client:
        try:
            response = await client.get(url, headers=headers, timeout=30.0)
            response.raise_for_status()
            return response.json()
        except Exception:
            return None

# Initialize FastMCP server
weather_mcp = FastMCP("weather")

def format_alert(feature: dict) -> str:
    """Format an alert feature into a readable string."""
    props = feature["properties"]
    return f"""
Event: {props.get('event', 'Unknown')}
Area: {props.get('areaDesc', 'Unknown')}
Severity: {props.get('severity', 'Unknown')}
Description: {props.get('description', 'No description available')}
Instructions: {props.get('instruction', 'No specific instructions provided')}
"""

@weather_mcp.tool()
async def get_alerts(state: str) -> str:
    """Get weather alerts for a US state.

    Args:
        state: Two-letter US state code (e.g. CA, NY)
    """
    data = await call_weather_api(f"/alerts/active/area/{state}")

    if not data or "features" not in data:
        return "Unable to fetch alerts or no alerts found."

    if not data["features"]:
        return "No active alerts for this state."

    alerts = [format_alert(feature) for feature in data["features"]]
    return "\n---\n".join(alerts)

@weather_mcp.tool()
async def get_forecast(latitude: float, longitude: float) -> str:
    """Get weather forecast for a location.

    Args:
        latitude: Latitude of the location
        longitude: Longitude of the location
    """
    # First get the forecast grid endpoint
    points_data = await call_weather_api(f"/points/{latitude},{longitude}")

    if not points_data:
        return "Unable to fetch forecast data for this location."

    # Get the forecast URL from the points response
    forecast_url = points_data["properties"]["forecast"]
    forecast_data = await call_weather_api(forecast_url)

    if not forecast_data:
        return "Unable to fetch detailed forecast."

    # Format the periods into a readable forecast
    periods = forecast_data["properties"]["periods"]
    forecasts = []
    for period in periods[:5]:  # Only show next 5 periods
        forecast = f"""
{period['name']}:
Temperature: {period['temperature']}°{period['temperatureUnit']}
Wind: {period['windSpeed']} {period['windDirection']}
Forecast: {period['detailedForecast']}
"""
        forecasts.append(forecast)

    return "\n---\n".join(forecasts)

def main():
    print("Starting FastMCP server...")
    weather_mcp.run(transport='stdio')

if __name__ == "__main__":
    main()
그리고 실행하면 된다.
 MCP 서버는 JSON-RPC 기반으로 클라이언트를 위한 엔드포인트를 제공한다.
그리고 아직은 서버를 따로 구축해서 사용하는 형태는 잘 지원되지 않아서, 보통 각각의 로컬 머신에 설치하고 서버를 실행해서 클라이언트와 서버가 같은 머신에 돌리는 형태가 일반적이다.
그래서 이것도 일반적인 웹서버처럼 접근해서 사용하지는 못한다.
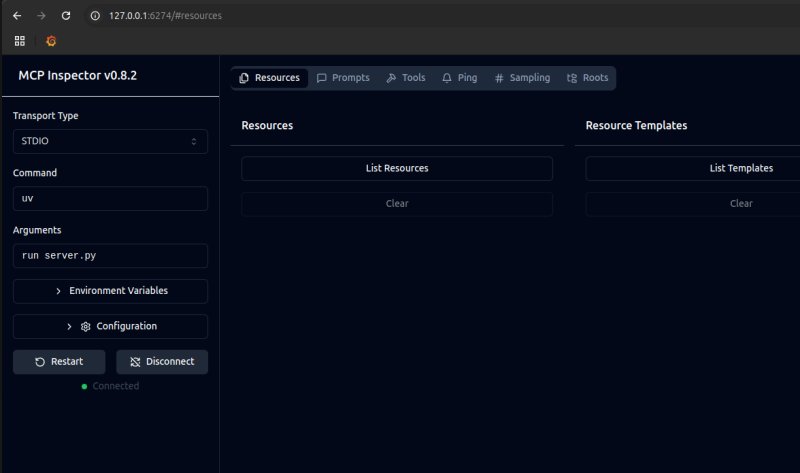
디버깅 도구: inspector
일반적인 단순 테스트용으로는 MCP 자체 디버깅 도구인 inspector가 권장된다.
터미널 기반으로 간단하게 실행할 수 있고, 브라우저 기반으로 디버깅 페이지를 열어준다.
실행 방법은 간단하다. npx를 통해서 즉시 실행이 된다.
npx @modelcontextprotocol/inspector uv run server.py
그러면 이렇게 디버깅 페이지가 열리는데
여기서 "Tools"가 우리가 방금 만든 도구들이다.
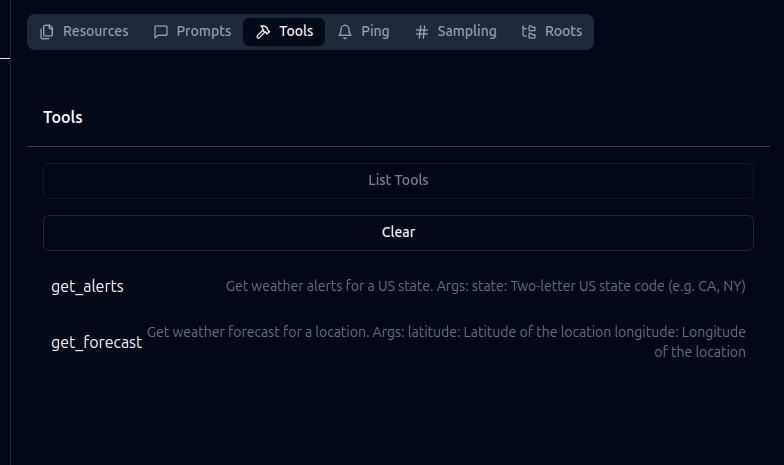 여기서 목록과 설명을 확인할 수 있다.
LLM에 붙여서 쓸 때도 이걸 리스트업해서 확인하고 사용하는 것이다.
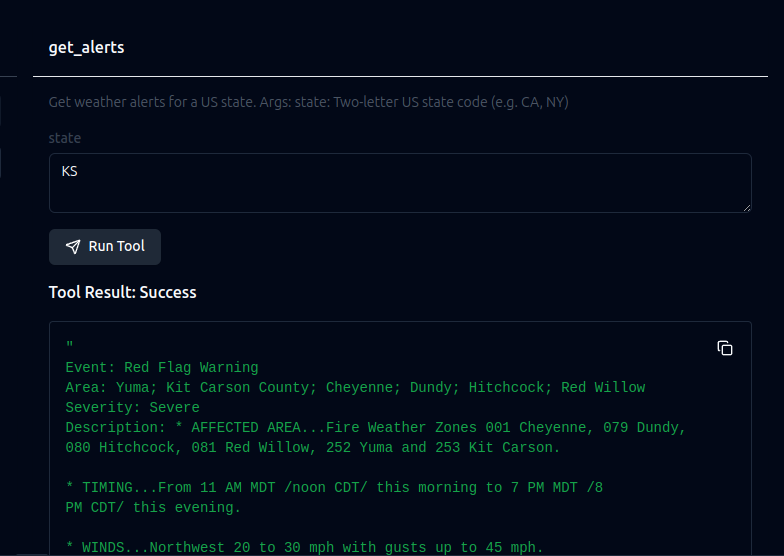 그리고 파라미터도 넣어서 바로 실행해볼 수 있다.
Cline로 접근해보기
대표적인 MCP 클라이언트 구현체로는 claude desktop 같은 일반 LLM 프롬프트 도구와, cline, continue, cursor 같은 LLM 기반 개발도구 정도가 있다.
MCP 자체가 애초에 LLM에 데이터를 제공해주는 보조 역할에 불과하기 때문이다.
cline의 경우에는 상단 + 오른편의 버튼을 누르면 MCP 탭이 열리는데
 Configure 버튼을 누른 다음에
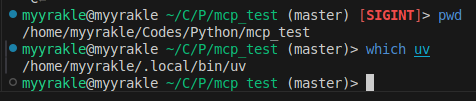 uv와 프로젝트 경로를 찾고
{
  "mcpServers": {
    "weather": {
      "disabled": false,
      "timeout": 60,
      "command": "/home/myyrakle/.local/bin/uv",
      "args": [
        "--directory",
        "/home/myyrakle/Codes/Python/mcp_test",
        "run",
        "server.py"
      ],
      "transportType": "stdio"
    }
  }
}
이런 식으로 저장해주면 된다.
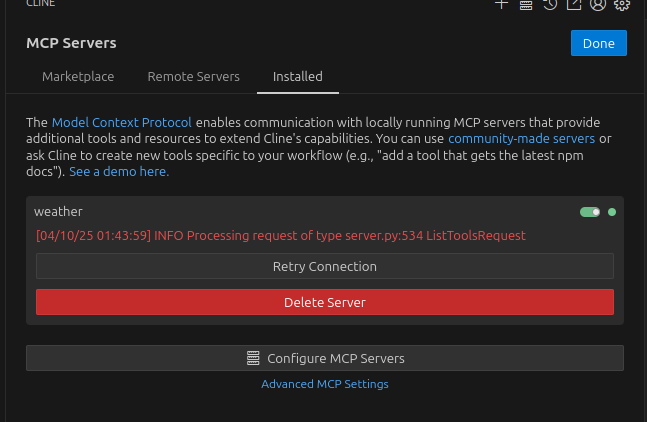 그럼 이렇게 연결이 되는데, 시뻘겋게 뜬다고 오류가 난건 아니다. 잘 된거다.
이 상태에서 해당 컨텍스트에 맞는 질문을 하면
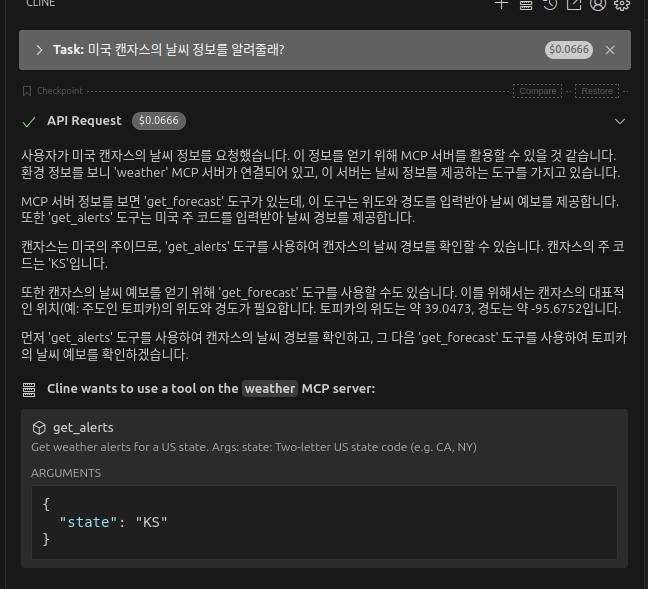 바로 weather MCP를 찾아서 쓰려고 시도하고
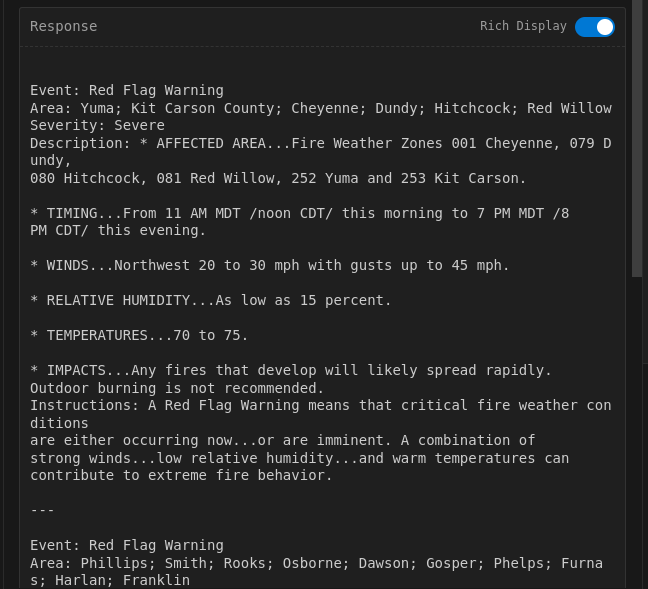
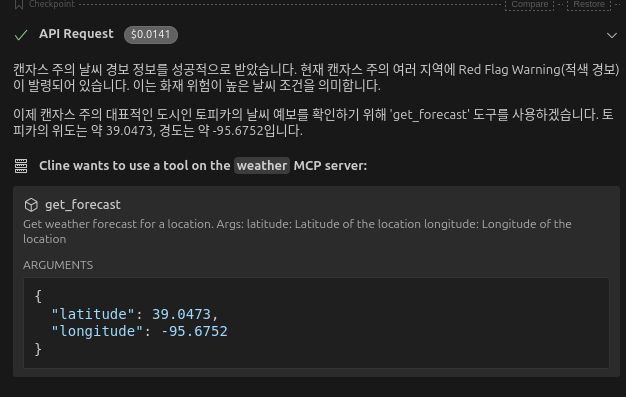 실제로도 잘 쏴준다.
대충 이런 느낌으로 쓰는 것이다.
서버 구현체들
AI 흐름에 편승하기 위한 수많은 기업들이나 오픈소스들이 MCP 서버들을 플러그인처럼 뿌리고 있다.
https://github.com/modelcontextprotocol/servers
잘 찾아보면 직접 구현할 필요 없이 갖다쓸 수도 있다.
다음 포스트에서는 MCP의 나머지 리소스 단위인 Resource와 Prompt 등에 대해서 다뤄보겠다.
참조
https://modelcontextprotocol.io/quickstart/server
https://blog.logto.io/ko/what-is-mcp